Deploying Dapps on the Internet Computer with Chain IDE.

I break down complex Web3 topics so that my 85 year old Grandpa can understand them.
Introduction
Local machines by default are not set up for developmental work. The user has to first set up a development environment to start developing apps. The user has to figure out and download configuration files that work for their machine.
This process is so frustrating because one missing file will cause the whole environment to misbehave. Offline IDEs have been developed to tackle this problem. These IDEs bundle all the files and plugins required for a working environment into one program which can be downloaded as a whole.
The downside of offline IDEs is that they are heavy, and require the computer to have minimum specifications for them to run properly. An alternative to offline IDEs is to use an online IDE.
It provides the same features and functionality as offline IDEs but in the browser. The user does not have to download any additional software or plugin to use an online IDE, and ChainIDE is one of them.
What is ChainIDE?
It is an online Integrated Development Environment for creating decentralized applications on different chains. It allows developers to easily write, test and deploy dapps on different chains. Some of the supported chains include Ethereum, DFINITY, BNB, and Polygon among others. It offers a user-friendly experience that simplifies the development process for developers across different chains.
In this guide, we shall look at how to deploy a dapp on the DFINITY chain using ChainIDE.
Create a new DFINITY project.
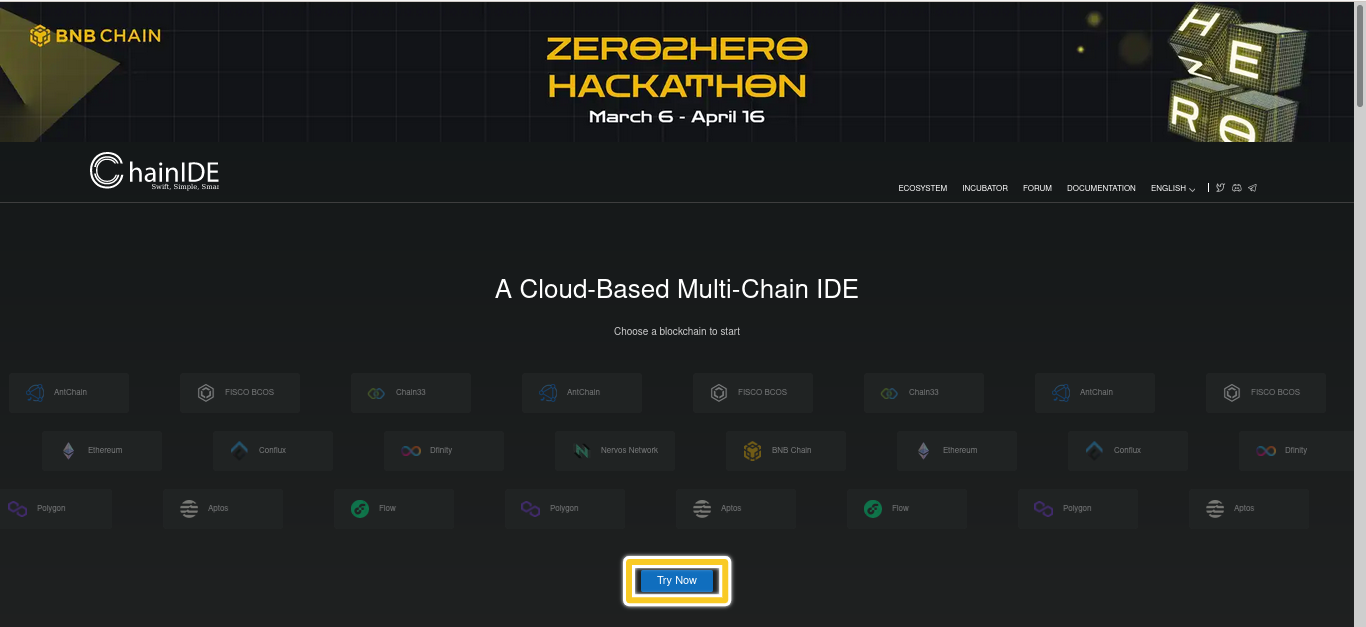
- Visit ChainIDE, and click on the Try Now button on the home page of ChainIDE as shown in the figure below.
Click on New Project

When the new window appears, select DFINITY from the left panel.
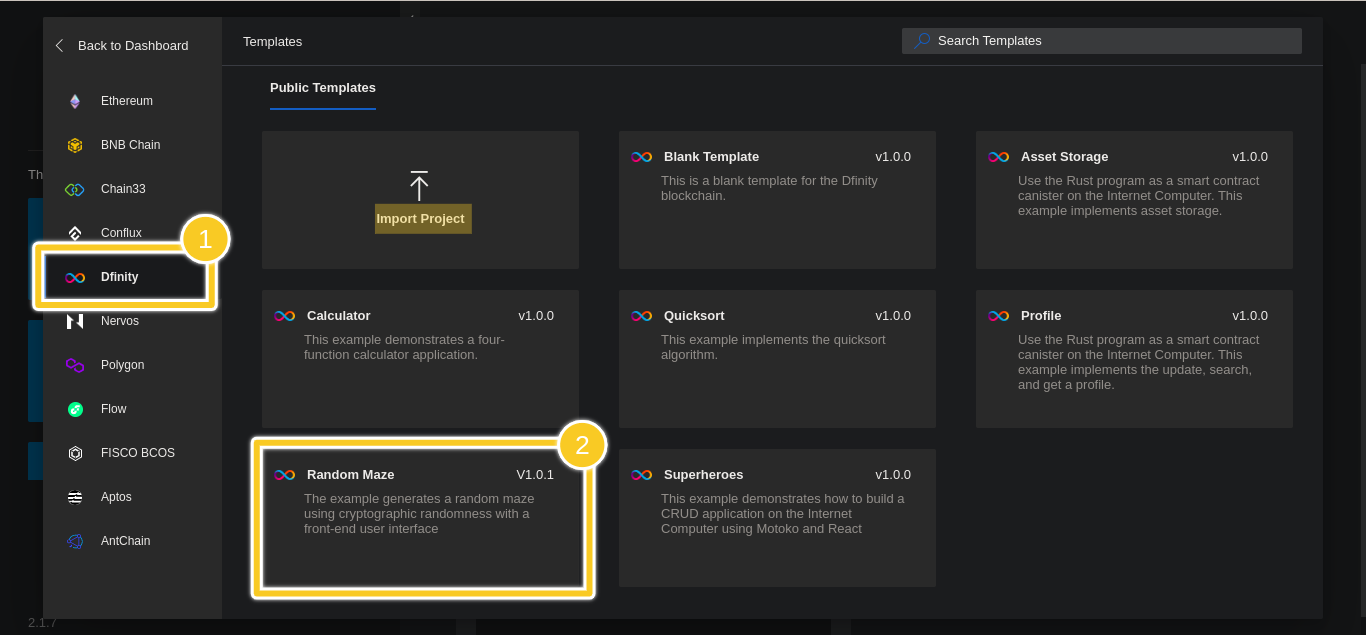
You can import an existing project from the local machine or GitHub using the Import Project button.
Alternatively, you can select one of the built-in templates and make changes per the requirements.
For demo purposes, we will use the Random Maze template. It contains two canisters; random maze for the back end and random maze assets for the front end.
Workspace overview
After creating a project, the workspace on the current project is displayed. The workspace as a whole can be divided into the following four parts:
The top bar includes the Back to Dashboard button, project name display, and modification,
The left panel for user information, including explorer (ie file tree), PLUGIN MANAGER (management plug-in),
The right panel and the plugins related to the contract project deployment interaction are here at the bottom bar, the entrance of Welcome and Logger
You can click the Logger at the bottom to invoke the Panel at the bottom to view the IDE log output, Terminal, port forward, etc.

Deploy the project to the IDE local mode
We will perform this section in three steps.
Starting the local node
First, the user needs to start a local node in the current IDE. The IDE provides a shortcut tool for the users to start the local network with one click. The user can also manually open a Terminal and start the node through the Dfinity SDK.

Click on Tools in the right panel
Specify the IP as 0.0.0.0 and the port as 8000 or any other port not occupied by other services
choose a flag
Click Start
The IP 0.0.0.0 will ensure that the node is accessible externally
Optionally, you can start a node by typing the command below in the Sandbox
dfx start --host 0.0.0.0:8000
Once the local node is up and running, its now time to go to the next step.
Secure port for forwarding and configure local net
Before we continue, if the project contains a package.json file, ensure to install the dependencies before attempting to deploy the project, otherwise, it will throw an error like the one below.
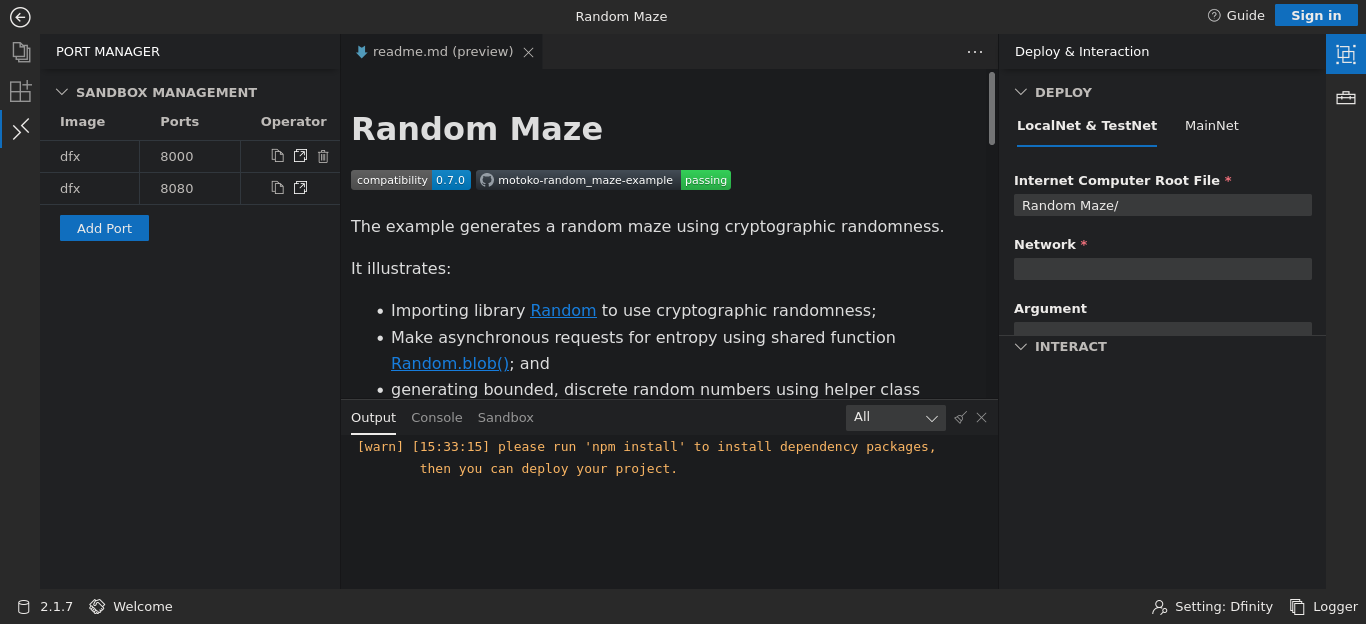
To install the dependencies, run the following command in the Sandbox
npm install
Once the dependencies are installed, perform the next steps
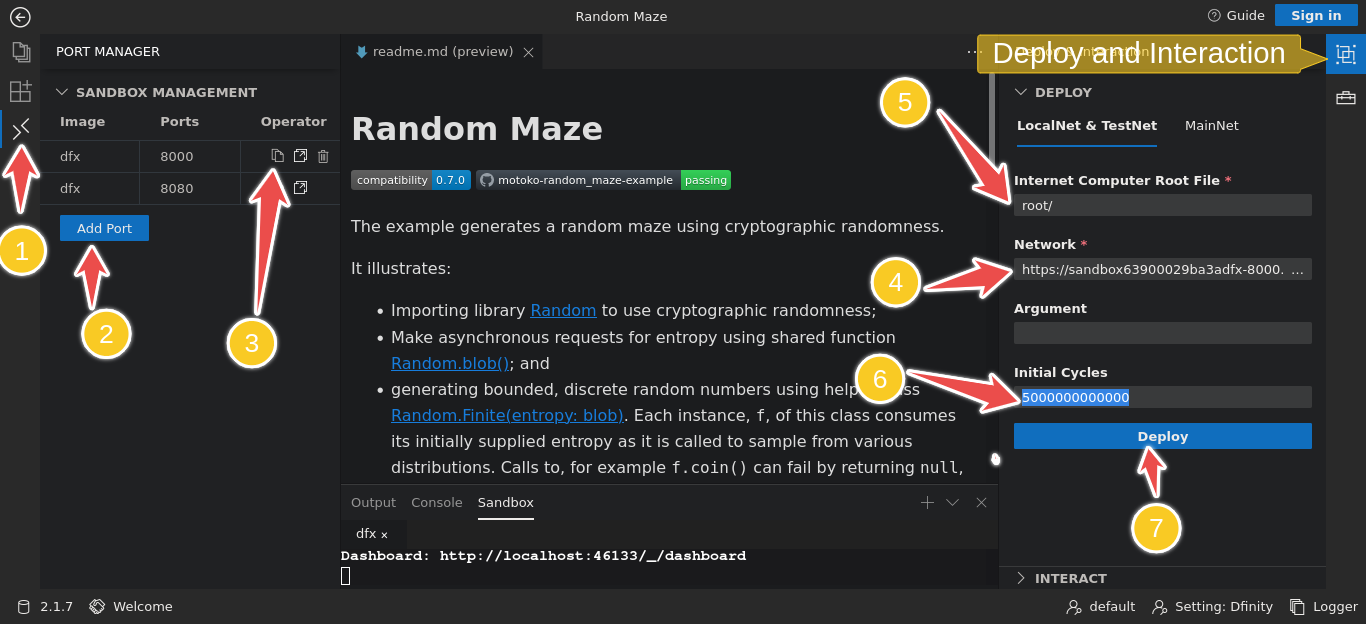
Click on Port Manager.
Click on Add Port. Select
dfxas the Image and8000as the port number to add it to the list of portsCopy the port URL.
Setting up the Deploy Panel.
On the right panel, click on
Deploy and InteractionPaste the port URL in the network
Enter
root/as the Internet Computer Root FileSpecify the initial cycles. The number should be more than a few trillion cycles as the minimum amount required to create a canister is one trillion cycles
Click Deploy, and wait for the process to finish.
Once the deployment is done, you should have an output in the Sandbox like the one below.
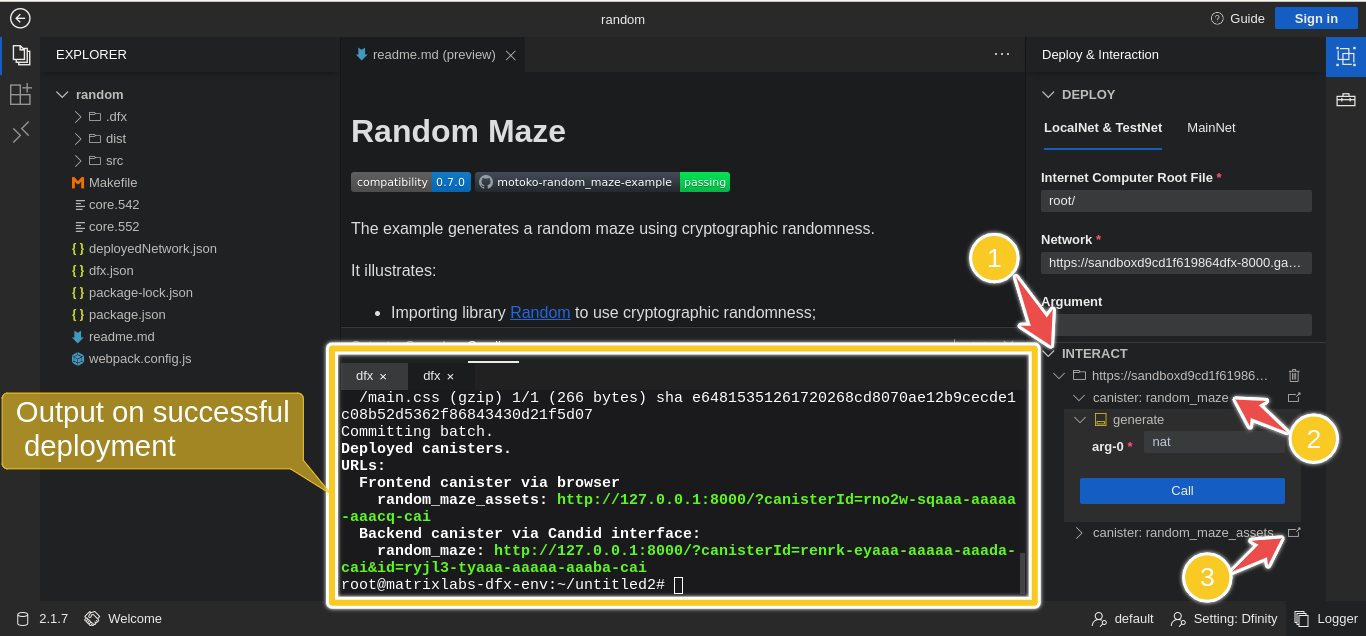
Still, in the right panel, click on
INTERACT.There are two canisters under the port URL that we used to deploy our project. You can interact with the backend canister and call the methods directly in the IDE.
To access the UI for the front-end canister, click on the arrow in front of the canister name. It will redirect you to the frontend UI where you can interact with the project.
You now have a working project deployed on the local net running in the browser using Chain IDE.
Conclusion
Chain IDE simplifies the whole process of developing apps on different chains by providing an easy-to-use platform in the browser that requires no initial setup. A lot more features are being developed by the Chain IDE team to provide a better user experience and soon we will some changes to the platform. For any inquiries, you can reach out to the chain IDE team on discord for any assistance.


