

Introduction
A token faucet is a powerful tool that allows individuals and businesses to distribute small amounts of cryptocurrency or tokens to a large number of users. However, to ensure that the distribution is fair and efficient, it is important to implement certain restrictions and checks on the token faucet. In this article, we will explore how to build a token faucet that includes checks to validate submitted accounts, check if the user has claimed tokens before, and restrict the frequency of claims.
This token faucet will not allow users to claim tokens more frequently than once every 24 hours. By implementing these restrictions, the faucet can prevent abuse and ensure that the token distribution is fair and equitable for all users. In addition, this faucet will validate user accounts to ensure that only valid accounts can claim tokens. Here is a demo of what we will build and the code for this project can be found on the GitHub repository.
Prerequisites
dfx installed on your local machine.
Prior knowledge of the Motoko language.
Knowledge working with HTML, CSS, and Javascript.
Initializing the Project
//start a new Project
dfx new tokenFaucet

//navigate to the project folder
cd tokenFaucet

//install the dependencies
npm install

//start the server
dfx start
We will begin by creating a new project tokenFaucet using dfx in the terminal. We then install the dependencies, and start the execution environment.
Open the project folder with your favorite code editor and let's begin.
Setting up the token ledger canister.
In this section, we will deploy a token MOTOKO-INU that follows the ICRC1 standard. This is the same token that we will be distributing to our users in this whole project. To deploy our token, we have to specify a few things like the name of the token, symbol, number of decimals, and the account that is authorized to mint and burn tokens, among other things.
Once we deploy our token, the ICRC1 standard exposes methods to interact with the token canister. We can check the name and symbol, and even transfer our token to another user. Learn more about the ICRC1 standard.
We will use the icrc1_transfer method to send tokens to the users that request them. Now this method works in an interesting way. When we call this method, we don't need to specify the account from where the tokens will come from.
This method automatically uses the account associated with the Principal ID that called it as the account where the tokens will be coming from. In this way, a user cannot specify someone else's account in order to steal tokens. Special treatment is given to the Principal ID that we specify as a minting account when we deploy our token canister. When this Principal ID calls this method, it does not need to have any token balance, rather new tokens will be minted and sent to the user.
We will specify the minting account as the Principal ID of our tokenFaucet_backend canister. We want the user to send a request to the tokenFaucet_backend canister, and in turn, it will mint new tokens and send them to the user.
Deploy the token canister
To deploy our token canister, we need to download some special files that will make the canister work. Follow this guide from dfinity on how to download the required files and also define the canister settings in the dfx.json file.
After downloading the files and updating the dfx.json file to include our token canister, we will need to change a few things before we deploy our canister. We will specify the minting account as the Principal ID of our tokenFaucet_backend canister. So we need to get hold of that ID.
In the terminal, run this command
dfx canister create --all
This will create the canister IDs for the tokenFacuet_frontend, tokenFaucet_backend and the icrc1-ledger canisters. At this stage, we are only interested in the Principal ID of the backend canister. It's the one we will use in the next step to deploy the canister on our local network.
//Change the variable to "ic" to deploy the ledger on the mainnet.
export NETWORK=local

//Specify the Principal that will burn and mint tokens
export MINTER_PRINCIPAL=$(dfx canister id tokenFaucet_backend)

//Change the variable to the principal that controls archive canisters.
export ARCHIVE_CONTROLLER=$(dfx identity get-principal)

export TOKEN_NAME="MOTOKO-INU"
export TOKEN_SYMBOL=MTKINU

dfx deploy --network ${NETWORK} icrc1-ledger --argument '(variant { Init =
     record {
       token_name = "'${TOKEN_NAME}'";
       token_symbol = "'${TOKEN_SYMBOL}'";
       minting_account = record { owner = principal "'${MINTER_PRINCIPAL}'";};
       initial_balances = vec {};
       metadata = vec {};
       transfer_fee = 10;
       archive_options = record {
         trigger_threshold = 2000;
         num_blocks_to_archive = 1000;
         controller_id = principal "'${ARCHIVE_CONTROLLER}'";
       }
}})'
Run the above code in the terminal of your root project. Once the canister is deployed, running this command returns the Principal ID of the account that is allowed to mint tokens. It should correspond to the Principal ID of the tokenFaucet_backend canister.
dfx canister call icrc1-ledger icrc1_minting_account
Backend canister development
Now that we have deployed our token canister, we need to import it inside the tokenFaucet_backend canister to be called its methods. In the dfx.json, update the tokenFaucet_backend canister settings to include the icrc1-ledger canister as a dependency.
"tokenFaucet_backend": {
      "main": "src/tokenFaucet_backend/main.mo",
      "type": "motoko",
      "dependencies": [
        "icrc1-ledger"
      ]
    }
Open the main.mo in the tokenFaucet_backend folder. All our code for this section will go in this file.
import myToken "canister:icrc1-ledger";
import Principal "mo:base/Principal";
import Nat "mo:base/Nat";
import Error "mo:base/Error";
import Result "mo:base/Result";
import HashMap "mo:base/HashMap";
import Time "mo:base/Time";
import Iter "mo:base/Iter";
We start by importing the necessary libraries to use in our program. We also import our token canister. We will be ordering it to mint new tokens inside the tokenFaucet_backend canister
actor backend {};
We declare an actor and give it a name backend. Our code will go inside the backend actor.
  public type Result<T, E> = Result.Result<T, E>;

// store if the user has claimed tokens for the first time
  private var hasClaimed = HashMap.HashMap<Principal, Bool>(
    1,
    Principal.equal,
    Principal.hash,
  );
We declare the result type from our library. In order to keep track of who has claimed tokens, we define a HashMap hasClaimed. This will store the Principal ID of the user and the status of whether they have claimed tokens. The idea here is that we want to give more tokens to a user if it is their first time claiming and reduce the amount when they come for a subsequent time.
  private var lastClaim = HashMap.HashMap<Principal, Int>(
    1,
    Principal.equal,
    Principal.hash,
  );
We define another HashMap lastClaim to keep track of the exact time the user claimed tokens. It stores the Principal ID of the user and the last known time they claimed the tokens. This will enable us to restrict the users from claiming tokens if the 24-hour period has not elapsed.
 // hours  minutes seconds nanoseconds
let waitingTime : Nat = 24 * 60* 60 * 1000000000;

var tokenAmount : Nat = 0;
We define an immutable variable waaitingTime to store the time in nanoseconds a user has to wait before claiming more tokens.
The tokenAmount variable will hold the number of tokens. It's of type var because we want to update it with an appropriate amount of tokens to give to the user depending on whether they are requesting for the first time or not.
public func claimTokens(account : Principal) : async Result<Text, Text> {

};
We declare a public function claimTokens. It takes in one argument account of type Principal, which is the user account that wants to receive the tokens. It returns a response with the type Result. Learn more about the Result type
if(not Principal.isAnonymous(account)){

  // go ahead and check if the user has claimed tokens before

}else{

  //return an error to indicate a wrong Principal ID

}
We start by checking to see that the account is not the anonymous Principal ID 2vxsx-fae. We will proceed only if the account passes this condition.
    let claim = switch (hasClaimed.get(account)) {
      case null false;
      case (?v) v;
    };

    if (claim) {

      //reduce the token amount to 5000 and check the last time the user claimed tokenss

      }else{
        //set the token amount to 15000 and transfer the tokens to the user

    }
We check in the hasClaimed hashMap to see if the user has claimed tokens before. We want to give a certain amount of tokens to the user that has never claimed before.
 tokenAmount := 5000;

  let lastTokenClaim : Int = switch (lastClaim.get(account)) {
    case null 0;
    case (?value) value;
  };
if the user has already claimed some tokens before, we update the tokenAmount variable to 5000 tokens. We then check to see the last time the user claimed tokens. The user must have claimed tokens more than 24 hours ago. If there is no record of the last time the user claimed tokens, we return 0, otherwise, we return the last time the user claimed the tokens.
if (not (lastTokenClaim == 0)) {
    //check if the (value returned + waiting time) is less than the current time in nanoseconds.


  }else{

    //return an error inidicating there is an issue in determing the user's sligibility

}
We are only interested in the scenario where the last time the user claimed tokens is known.
if ((lastTokenClaim + waitingTime) < Time.now()) {
  //transfer the tokens to the user
  let transferResult = await transferTokens(tokenAmount,account);

  }else{
    //tell them to wait until 24 hours have passed.

}
We check to see if the 24-hour window has passed. This is done by adding the waitingTime to the last known time of the user claiming tokens and then checking if the result is less than the current time in nanoseconds. The user is free to claim more tokens if the 24-hour period has passed, otherwise, we tell them to wait for a few more hours.
We call the transferTokens(). This function will initiate the icrc1_tranfer method to mint new tokens and send them to the user. We will define this function later on. The variable transferResult holds the outcome of the function.
let transferResult = await transferTokens(tokenAmount,account);
          if(transferResult == #ok("success")){
            lastClaim.put(account, (Time.now()));
            #ok("You have successfully claimed more 5000 tokens");

          }else{

            #err("Error in claiming tokens. Try again later");

          }
We check for the result code that is returned. if the transaction succeeds, we want to update the last time the user claimed the tokens to now. If the transaction fails, we send the user a message to notify them about the error.
we will only update the lastClaim hashMap if the transaction is successful since we considered a scenario where the user had already claimed tokens.
      tokenAmount := 15000;
      //call the transfer function
      let transferResult = await transferTokens(tokenAmount,account);
      if(transferResult == #ok("success")){

        hasClaimed.put(account, true);
        lastClaim.put(account, (Time.now()));
        #ok("You have successfully claimed 15000 tokens for the first time.");

      }else{

        #err("Error in claiming tokens. Try again later");

      }
if the user has never claimed before, we set the tokenAmount to 15000 and then call the transferTokens function. If the transfer is successful, we update both the hasClaimed and lastClaim HashMaps with the relevant information.
 private func transferTokens(tokens : Nat, account: Principal) : async Result<Text,Text>{
    //initiate the icrc1 transfer method
    let result = await myToken.icrc1_transfer({

      amount = tokens;
      from_subaccount = null;
      created_at_time = null;
      fee = null;
      memo = null;
      to = {
        owner = account;
        subaccount = null;
      };

    });

    //check the status of the transfer.
    switch (result) {

      case (#Err(transferError)) {
       #err("failure");
      };
      case (_) {
        #ok("success");
      };

    };

  };
Our transferTokens() takes in two arguments, account of type Principal that will receive the tokens, and tokens the number of tokens to send to the user. It will return a result of type Text if the transaction either passes or fails.
Inside the function, we call the icrc1_transfer method on the token canister that we imported and specify the required arguments. This will mint new tokens and send them to the user because the Principal ID calling this method is the minting account.
We wait on the result of the transfer and return an appropriate message on each of the scenarios.
Persisting data across upgrades
We need to keep records even when we upgrade our canisters. But it's not possible at this stage because we are using hashMaps that are not stable. The hashMaps used in our code are unstable and therefore cannot persist data across upgrades. We need to cater for scenarios where we may require to upgrade our canister without losing the information stored on it.
 //stable arrays to store our info during upgrades.
private stable var hasClaimedArray : [(Principal, Bool)] = [];
private stable var lastClaimArray : [(Principal, Int)] = [];
We declare two stable arrays hasclaimedArray and lastClaimArray. We will move our data back and forth to these arrays when we are upgrading our canister.
 system func preupgrade(){
  hasClaimedArray:= Iter.toArray(hasClaimed.entries());
  lastClaimArray := Iter.toArray(lastClaim.entries());
};


system func postupgrade(){
  hasClaimed := HashMap.fromIter<Principal,Bool>(hasClaimedArray.vals(),1,Principal.equal, Principal.hash);
  lastClaim := HashMap.fromIter<Principal,Int>(lastClaimArray.vals(),1,Principal.equal, Principal.hash);
};
The preupgrade() moves the data stored in the unstable HashMaps to stable arrays just before the upgrade takes place. The postupgrade() moves back data to the HashMaps after the upgrade is completed. Learn more about pre-upgrades and post-upgrades.
This marks the end of our backend canister code. The structured code can be found on my GitHub repository.
Deploy the backend canister
Run this command in your terminal to deploy the canister locally
dfx deploy tokenFaucet_backend
Frontend Development
In this section, we will develop a simple frontend for our dapp that will allow users to request and claim tokens.
Navigate to the tokenFaucet_frontend folder and paste the following code inside the index.html file
<!DOCTYPE html>
<html>
  <head>
    <title>token faucet</title>
    <link rel="stylesheet" type="text/css" href="main.css">
  </head>
  <body>
    <nav>
      <div class="nav-container">

        <h1 class="site-title">MOTOKO-INU FAUCET</h1>
        <img src="logo2.svg" alt="Website Logo" class="logo">
      </div>
    </nav>
    <div class="container">
      <div class="form-container">
        <form>
          <input type="text" id="principalid" placeholder="Enter your Principal ID to receive MTKINU tokens">
          <button type="submit">Claim!!</button>
        </form>
         <div class="loader-container">
          <div class="loader"></div>
        </div>
        <div class="error-container" id="error-container">
          <p class="error-message" id="responseId"></p>
        </div>
        <br>
        <br>
        <div class="instructions-container">
          <h2>NOTE:</h2>
          <ol>
            <li>This faucet is only for educational purposes. Tokens possess no real value.</li>
            <li> Accounts claiming for the first time will receive 15000 tokens.</li>
            <li>Accounts that have alreaady claimed before will receive 5000 tokens.</li>
            <li>You can only claim tokens once every 24 hours.</li>

          </ol>
        </div>
      </div>
    </div>
  </body>
</html>
This is a simple website that displays the name of the faucet and its logo. It has one input section where users can enter their Principal ID and a button to initiate the request. It also has a loader and a section to show the response from the backend.
body {
  margin: 0;
  padding: 0;
  font-family: Arial, sans-serif;
  background: linear-gradient(135deg, #5B86E5, #36D1DC);
}

nav {
  background-color: rgba(255, 255, 255, 0.8);
  padding: 10px;
}

.nav-container {
  display: flex;
  justify-content: space-between;
  align-items: center;
  max-width: 1200px;
  margin: 0 auto;
}

.logo {
  max-width: 200px;
  margin-right: 10px;
}

.site-title {
  margin: 0;
}

.container {
  display: flex;
  justify-content: center;
  align-items: center;
  height: calc(100vh - 60px);
}

.form-container {
  background-color: rgba(055, 055, 255, 0.8);
  padding: 30px;
  border-radius: 10px;
  width : 400px;
}

form {
  display: flex;
  flex-direction: column;
  align-items: center;
}

input[type="text"] {
  padding: 10px;
  margin-bottom: 10px;
  border-radius: 5px;
  border: none;
  width : 300px;
}

 button[type="submit"] {
  padding: 10px;
  margin-bottom: 10px;
  border-radius: 5px;
  border: none;
  background-color: rgba(255, 255, 255, 0.8)
  color: #fff;
  cursor: pointer;
 }


.error-container {
  margin-top: 20px;
  display: none;
}

.error-message {
  color: red;
  font-weight: bold;
  margin: 0;
}

.instructions-container {
  margin-top: 20px;
}

.instructions-container h2 {
  margin-top: 0;
}

.instructions-container ol {
  margin: 0;
  padding-left: 20px;
}

.instructions-container li {
  margin-bottom: 10px;
}

.loader-container {
  position: absolute;
  top: 50%;
  left: 50%;
  transform: translate(-50%, -50%);
  display: none;
}

.loader {
  border: 5px solid #f3f3f3;
  border-top: 5px solid #007bff;
  border-radius: 50%;
  width: 30px;
  height: 30px;
  animation: spin 2s linear infinite;
}

@keyframes spin {
0% { transform: rotate(0deg); }
100% { transform: rotate(360deg); }
}
Copy and paste the code in the main.css file inside the assets folder. We apply simple styling to the website.
import { tokenFaucet_backend } from "../../declarations/tokenFaucet_backend";
import {Principal} from "@dfinity/principal";


document.querySelector("form").addEventListener("submit", async (e) => {
  e.preventDefault();
  const button = e.target.querySelector("button");

        const loader = document.querySelector('.loader-container');
        loader.style.display = 'block';
        try{


         const principalId = document.getElementById("principalid").value.toString();

          const realId = Principal.fromText(principalId);

          const claimResult = await tokenFacuet_backend.claimTokens(realId);


          loader.style.display = 'none';

          document.getElementById("error-container").style.display = 'block';

          if(claimResult.err){
            document.getElementById("responseId").innerText = claimResult.err;

          }else{
            document.getElementById("responseId").innerText = claimResult.ok;


          }

        }catch(error){
          loader.style.display = 'none';
          document.getElementById("responseId").innerText = error;
        }
});
Inside the index.js, we import the tokenFaucet_backend from the declarations folder. We also import the Principal from the dfinity module. We will use this to format the Principal ID that the user will provide.
We add an event listener on the form for click events. When the user clicks the Claim!! button, the following happens:
We display the loader element to show the user that we are processing their request
We get hold of the Principal Id the user provides and format it
We call the
claimTokensfunction on the tokenFaucet_backend canisterWe store the result in a variable
claimResultWe check if the result contains an
errorokobjectWe hide the loader element
We display the result and show it to the user
This marks the end of our code for the front end. All the code can be found on my GitHub repository
Deploy the front-end canister
Rund this command in the terminal to deploy the canister
dfx deploy tokenFaucet_frontend
After a successful deployment, you should have something similar to this. Now you can request tokens by submitting your Principal ID. Remember, these tokens have no real value and are strictly for educational purposes.
Next Steps
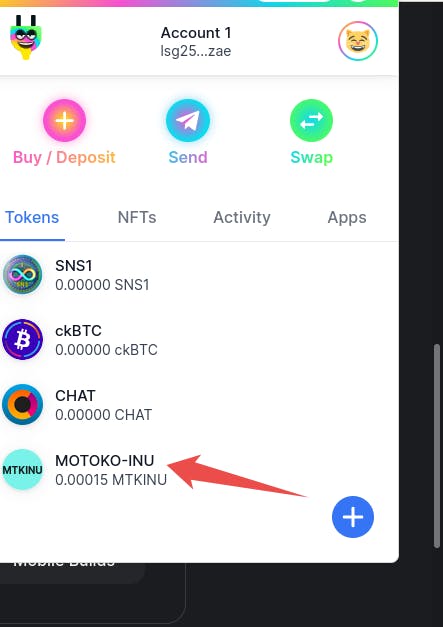
Our project is running locally. You can take it a step further and deploy it on the mainnet. You can also claim tokens to your online wallet account like Plug Wallet and view them inside your wallet. An example is shown below.
Conclusion
In conclusion, building a token faucet can be a useful way to distribute tokens in a controlled and fair manner. By incorporating checks to validate the user's account and to track the time of previous claims, the faucet can ensure that tokens are only distributed to legitimate users and that users are not able to claim tokens too frequently.
The implementation of a 24-hour waiting period before users can claim more tokens can also help to prevent token hoarding and promote more equal distribution. Overall, a well-designed token faucet can be a valuable tool for token distribution in various contexts, including blockchain-based platforms and decentralized applications.